In general, you can use RS232, Ethernet, RS485 and other way to download data When if it is difficult to communication or fail to communicate, you can use U flash disk to upload or download employee’s information and fingerprint, save these downloading data in the software.Choose the System Option from the Maintenance /Option menu; put
tick in USB Manage in “Function Option” pagination, so USB Disk Manage in the data menu become valid. Because the machine type is different, the data construction which has been downloading to U flash disk also is different, so before using the USB Disk Manage, firstly choose the machine type you use.
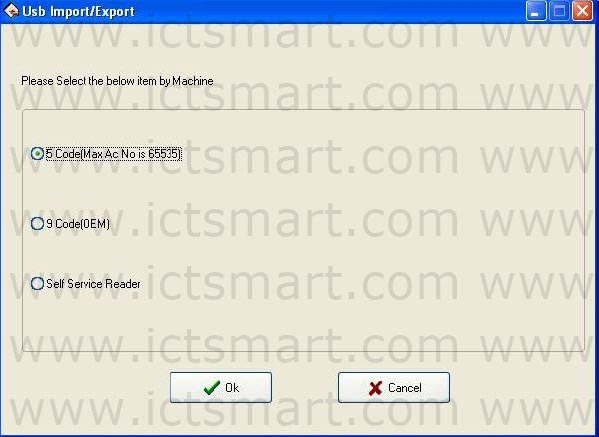
After choosing, press the [OK] to enter USB Disk Manage, maybe the error occur while download data is downloading cause of the mistake choice.
If multiple USB flash disks are available, enter the Select U Disk interface.
If only one USB flash disk is available, enter the USB flash disk management interface directly.
Import user data to PC
Select put U flash disk into the USB slot of the fingerprint device, choose “Menu”>”U flash disk management“>“Download User Data”, Press “OK”, when the window inform that system copy data successfully, take out U flash disk, and then plug it into PC USB slot. Start software, then click “Data”>”USB Disk Manage”, choose “Import user data”. Following interface will appear.

The current user data file which have been in U flash disk will display in “check rec Info” left column, after choose this file, click [Import user data] button, system will import data, this data will display in the middle list to inform that download data successfully.
Delete data from U Disk: Erase all data from the U flash disk.
Remove List: Clear employee’s information in the current list.
Refresh: Refresh employee’s information in the current list
Import from local disk: Import user data from PC other disk.
Export User Data to U flash disk
Export user data in the software to U flash disk for saving it or transferring other Device, here you can select user you want to upload, shown as following figure.
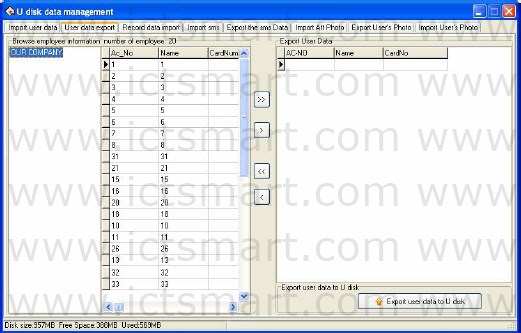
You can view all employee information in the left employee brown column; click the button for moving data in the middle area to import data Export User data area.
![]() Move all record in the left side Export User Data area.
Move all record in the left side Export User Data area.
![]() Move the employee that has been selected to Export User Data area.
Move the employee that has been selected to Export User Data area.
![]() Remove all record in right side from Export User Data area.
Remove all record in right side from Export User Data area.
![]() Remove the employee that has been selected to Export User Data area.
Remove the employee that has been selected to Export User Data area.
Import the record data to PC
Plug U flash disk into Device, select Menu>U flash Disk Management>Download record data, Press “OK”, and the window will inform that download data successfully. Take out U flash disk from Device, then plug it into USB slot of PC, click Data> USB Disk Manage and select Record data import pagination, shown as following interface.
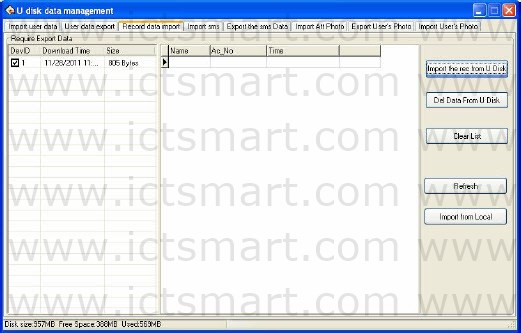
The information of user data which has been saved in U Flash disk will display in the left side Require Export Data list. Choose this file, Click [Import the rec from U Disk] button, system will import data, these data will display in the middle list to inform that download datasuccessfully.
Del Data From U Disk: Erase all data from the U flash disk
Clear List: Clear short message in the current list.
Refresh: Refresh Employee’s information in the current list.
Import from local: Import user data from other disk of PC.
Import Short Message
Plug U flash disk into Device, select Menu> U flash Disk Management> Download SMS, Press “OK“, the window will inform that download data successfully. Take out U flash disk from Device, then plug it into USB slot of PC, click Data> USB Disk Manage and select Import SMS pagination, shown as following interface

Click “Import Short SMS from U Disk“, the data will be imported system, after import data successfully, this total of data will display in the following prompt, all content of short message which has been imported will display on the Add new rec to Local: Add the short message which has not existed in the software into the software. Overwrite the Local data: Use the imported data to overlay the data in software. Del Data From U Disk: Cancel the short message data in the U flash disk. Clear List: Clear the short message in current list. Refresh: Refresh Short message in the current list.
Export short message
Export short message in the software to U flash disk or upload this message to other Device, here, may select this short message you want to upload, shown as following figure.
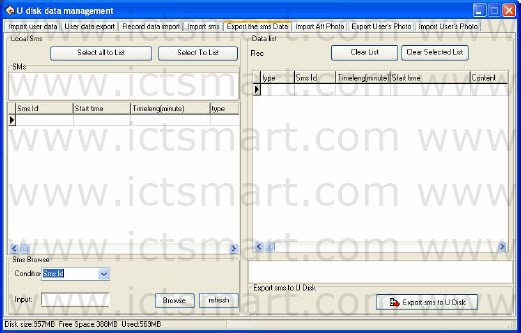
You can view all short message in the software from the left side column, this short message still exist in the “SMS” after it is selected, when if there are lot of short message to search for, you many utilize following way to find it, such as short message serial No., content, Public short message, User short message.
Select To List: Choose the SMS that want to be uploaded, click [Select To List] button, the record will be move to right side list.
Select all to List: Choose and remove all SMS in the system to right side list.
Clear List: Erase all record in the right side list, it is unable to upload the SMS or reselect the SMS to upload.
Clear Selected List: Choose this record which doesn’t need to be uploaded, and then click this button to clear the record from this list, and then this SMS will be deleted from the right side list.
Note: this function is valid only for the machine with U flash disk
Images taken into machine
U will be preserved after the attendance photos downloaded to the software (download only the attendance by the photo, that is, after the U pass in a folder of all the photos). Attendance blacklist photos “bad folder of all the photos” can only be read after the U.
Import machine photographs: U session will be kept by the attendance through the photos, download software to view. UData: delete U intraday attendance through the preservation of the photos.
Note: The software supports attendance cameras can use this feature .
Import Images that is taken by machine Download the attendance checking photo contained by the U flash disk to the software (only the attendance photo is available to download, that is all the photos in a passed folder). Attendance blacklist photos “all the photos in the bad folder” can only be read through the U flash disk.
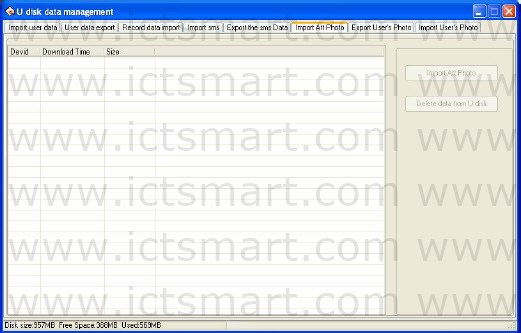
Import Images: downloaded the attendance photos in the U flash disk to software to view.
Delete Data from U disk: delete passed attendance checking photos in the U flash disk.
Note: The software supports attendance cameras can use this feature.
Export User’s Photo to the USB disk
Export the user’s photo in the software to the USB disk for storage or upload the user’s photo to other device. Select the user’s photo to be uploaded, as shown in the figure below.
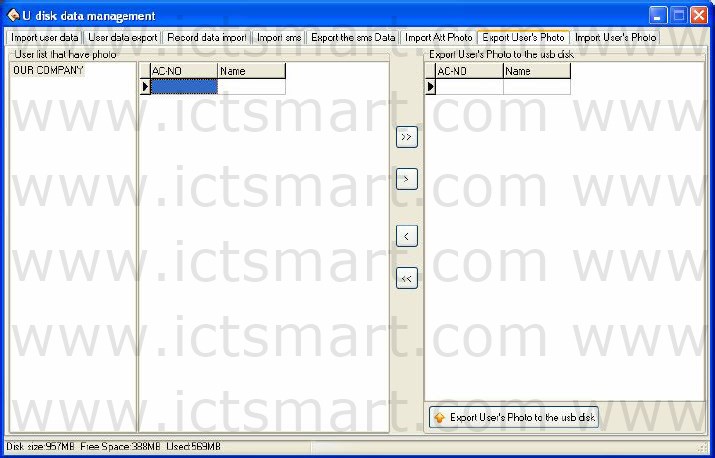
On the left of the employee information view column, in the User list that have photo, select employees by department. Click the move buttons on the middle to transfer the user’s photo to be exported to the “Export User’s Photo to the USB disk” area on the right.
![]() transfer all the selected records from the left to the “Export User’s Photo to the USB disk” area
transfer all the selected records from the left to the “Export User’s Photo to the USB disk” area
![]() transfer the selected record from the left to the “Export User’s Photo to the USB disk” area
transfer the selected record from the left to the “Export User’s Photo to the USB disk” area
![]() remove all the selected records from the “Export User’s Photo to the USB disk” area
remove all the selected records from the “Export User’s Photo to the USB disk” area
![]() remove the selected record from the “Export User’s Photo to the USB disk” area
remove the selected record from the “Export User’s Photo to the USB disk” area
Import User’s photo
Import the user’s photo stored in the USB disk to the software.
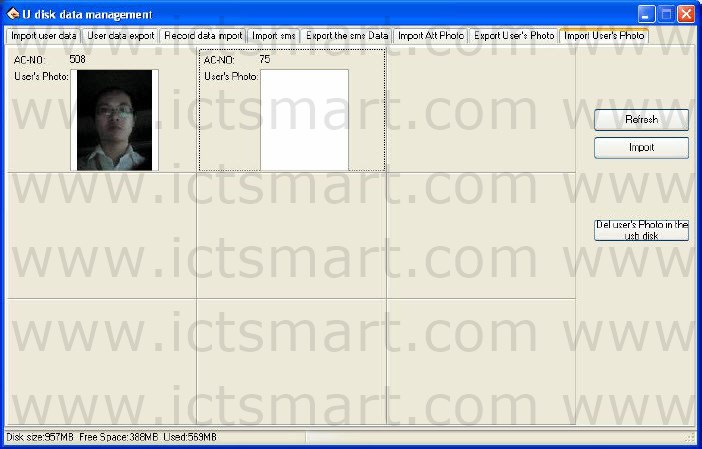
The left column of the page displays the user’s information and photo stored in the existing USB disk. Select the photo and click Import. The system starts to import the photo.
Refresh: update the display of the USB disk drive and the user’s photo in the list
Import: import the user’s photo in the USB disk to the computer
Del user’s Photo in the disk: delete user’s photo in the disk
| ย้อนกลับ | กลับสู่เมนูหลัก | ถัดไป |