Select the “Maintenance/Setup“, click Employee Maintenance item, open “Employee list“, within this window, maintenance employee’s various information and attendance setting. Through the employee list you can view the department the employee belongs to, here to view and modify employee’s information is available, at here attendance setting privilege is superior to Assign Employee Schedule.
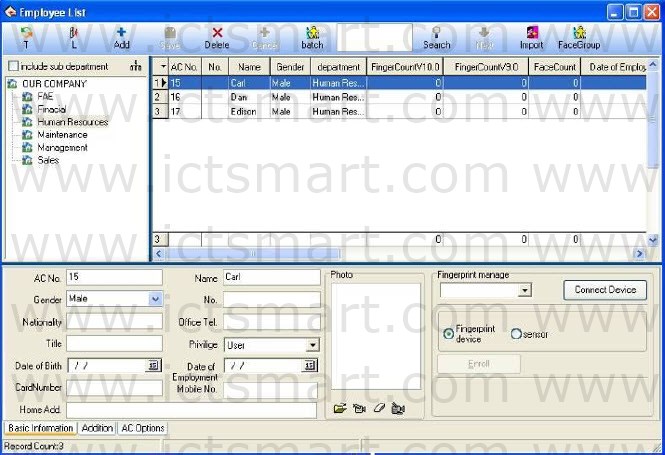
The window of Employee List divided into two parts. 1. The upper half part is employee list, list columns show employees all information, including the registration number (ACNo.), name, title, No., Finger Count V9.0, Finger Count V10.0 and so on. The 9.0 and 10.0 are the algorithm version number. The bottom of the employee list has a line of statistics; the statistics of each column corresponds to the sum of the values. The first column show total number about employee.
2. The lower half part is the currently selected employee’s various information and can be modified, Have three paginations, click the page tag at the bottom can enter different page. User can use Search function to search employee when the employee are excessive. Input query condition into the box, click “Search” button to see the result.
Note: Click each column name can sort list by it.
1. Employee Maintenance Must fill the blank of the employee’s information list with the employee’s name, enrolling number, according to the actual need you can add other information about employee.
Note: it is different with old software, we have increased a new function in Maintenance/Options item , the User number distinguish from enrolling number, the enrolling number is suit for Device, and according to normal Device, the enrolling number don’t more than 65535 ,but the user number have not limit to its size number.
1). Addition New Employee
When usual execute this management program at first time, after registering the user in the Device, than directly downloads it to software, and revise name, as well as save it, upload it the machine to use again.
If have to directly add the employee in software, in order to guarantee the user information and the fingerprint or the card one to one correspondences, connect with Device to go on the realtime registration fingerprint and the card is available in this interface. After connects the Device, every time while add a employee the corresponding person’s fingerprint or the card will be registered simultaneously. Avoids the trouble which the fingerprint or the card and the personnel does not correspond appears.
A. registration fingerprint
Fingerprint device: Register the fingerprint with the standalone fingerprint Machine.
Under in “Fingerprint manage” dragdown box, choose the fingerprint device that have attached to system, after connects successfully, starts to add the employee. Select the department which the employee is at, after click ” ” button, input employee’s register number, name and other related information. Singleclick “register” button to start the fingerprint registration.
Sensor: Register the fingerprint through the online fingerprint device to t.
Attention: when you choose fingerprint sensor to enroll, there are two
choice: ZkFinger9.0 and ZkFinger10.0, for the operation detail refer to Appendices 3.8 How to Generate License Files.
Sensor Registration flow:
Singleclick “Enroll” button, shown as figure:
Start to register, click any finger in the interface with the mouse, the fingerprint Device that has been connecting with is in the registration condition:
Attention: You can choose to enroll duress fingerprint, but it is only effect when the device supports the function, otherwise it is just a general fingerprint.
Follow prompts or press fingerprint on sensor face of the fingerprint device or fingerprint scanner, after press 3 times, prompt inform you registers successfully, then fingerprint registration finish. If want to backup fingerprint for system, chooses a finger registration. After the registration complete, press “OK” to return add the employee interface, continue to add the employee.
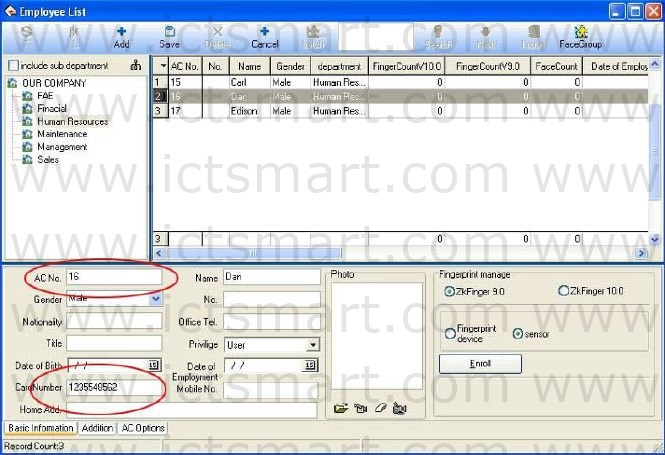
B. Registration card
Under “Fingerprint device” dragbox, choose the Device with radio frequency card function, after connects successfully, and starts to add the employee. Selects department which the employee is at, Click ” ![]() ” button, wave the card which want to be registered on the radio frequency card machine, after waving the card, this employee’s register number and the card number can display the corresponding card the information, according to needs to change the serial number and the name, the card number do not change at random. The card number’s length is 10. The cursor locates in the name column.
” button, wave the card which want to be registered on the radio frequency card machine, after waving the card, this employee’s register number and the card number can display the corresponding card the information, according to needs to change the serial number and the name, the card number do not change at random. The card number’s length is 10. The cursor locates in the name column.
If want to add new employee, press ” ” button to repeat above this operation.
2)Add Batch Employees: When some departments enroll a lot of employee, you can use this function to add employees, lighten an operator work. E.g., a lot of employees want to be added to the FAE department, first select FAE department; click on the “Add batch employees” button, the adding batch employees’ window appears.
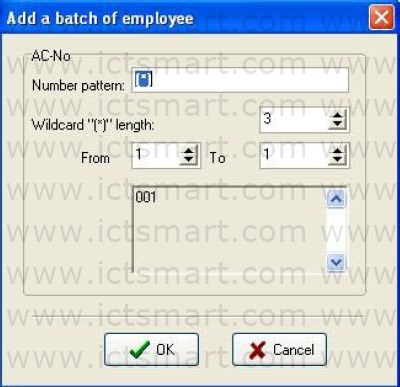
A. If there are not employees in this department, the following appear
B. If there are employees in the department, the following appear
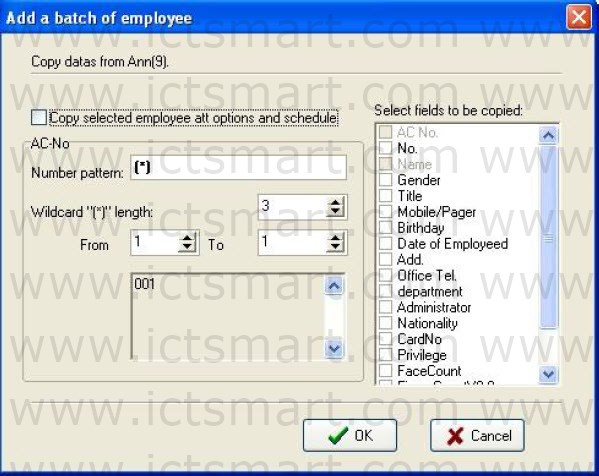
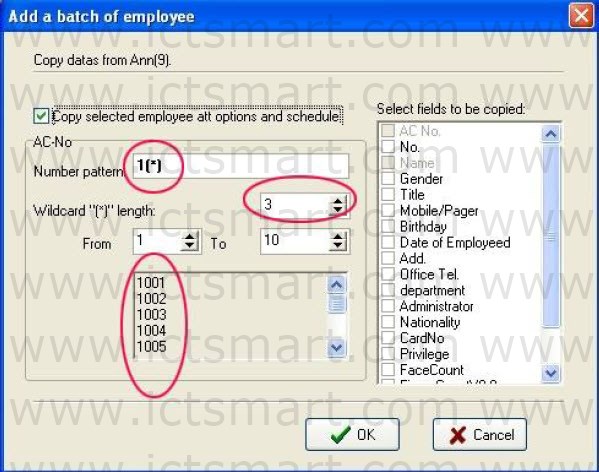
The backup data of employees witch select from FAE department display on the leftup corner, if the new added employees and selected employees own the same the shift and attendance setup, leftclick “Copy selected employee att options and schedule“, if there are other same field, select relating to fields from the Select fields to be copied list. ACNo batch increase that department on adding batch employee. Through the “*” Number pattern, it is easy to add employee’s ACNo.
Number pattern: That means ACNo’s format, for example, the employee’s ACNo of this department is the figure 1 at the first, and its pattern is 1***, input 1″*” to the Number pattern box, and input 3 to the Wildcard “(*)” length box. The window display following:
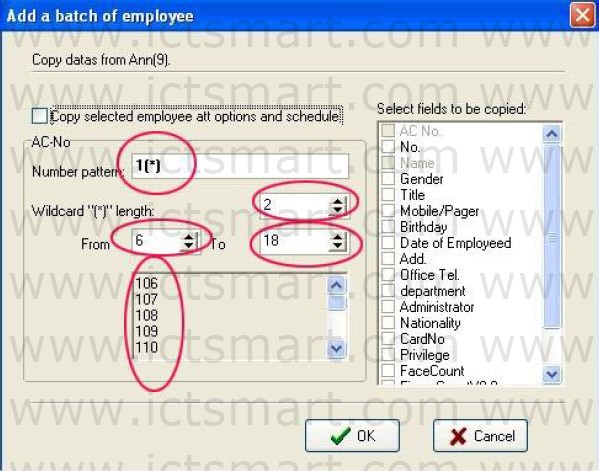
Wildcard “(*)” length: That is mean, how many figure the Number pattern has. E.g. the forward section of the ACNo is 1***, its Wildcard “(*)” length is 3, if the ACNo is 1**, so its Wildcard “(*)” length is 2. After the Wildcard “(*)” length has been defined; by use the “From” box, “To” box to create ACNo range. E.g. create the ACNo range from 106 to118; input 6 to “From” box, import 18 to “To” box, the Wildcard “(*)” length is 2, but from 6 to 9 width is one figure. At this condition, the system will add zero automatically. Shown as following interface:
Click on the “OK” button, add employees, and click on the “Cancel” button, return the Employee List interface.
3)Modify Employee
Do not modify Employee’s ACNo. Avoid there information don’t match corresponding information in the Device. Select the employee, enter new data in the corresponding input box, and then press “Save” button to save.
4)Transfer Employee
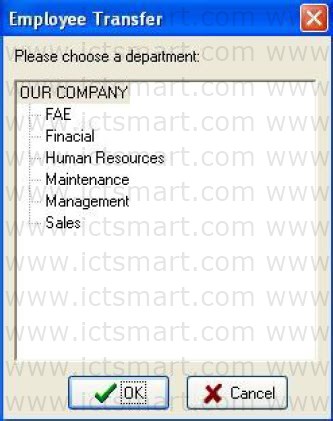
Click the ” ![]() ” button to transfer employees from one department to another department and this dialog box will popup
” button to transfer employees from one department to another department and this dialog box will popup
 jm8u
jm8u
In the box of Fold Department select the department to add new employee in, and click “OK” to transfer
5) Employee’s layoff
Some employees may remain in the company, but who don’t belong to any department now, which is similar to the currently quite popularized layoff phenomenon. Leavingpost employees can be reemployed through Employ Employee in Department Management. Click ” ![]() ” button to present this dialog box the employee, or “Cancel” to cancel this action.
” button to present this dialog box the employee, or “Cancel” to cancel this action.

Press “Yes” button to layoff the employee, or press “No” to abandon this action.
6) Import user data
Import user data from the local disk.
Click “ ![]() “ button, and the Import User Data interface pops up.
“ button, and the Import User Data interface pops up.
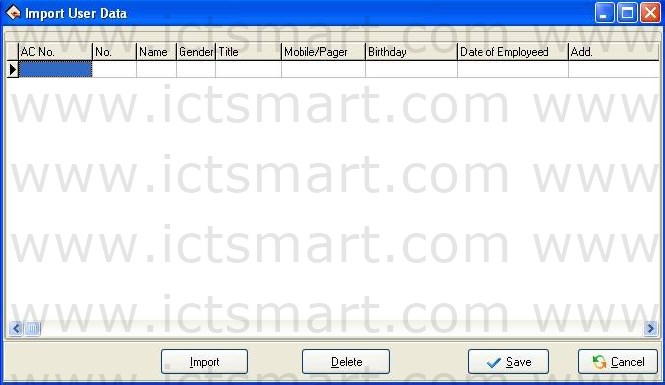
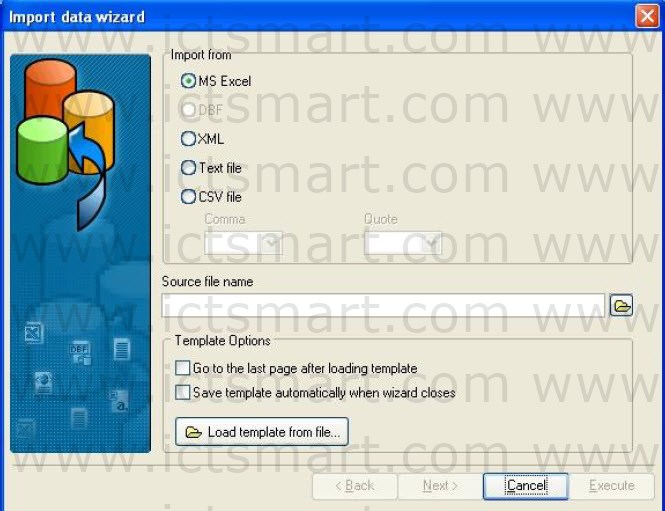
Click Import button, then the Import data wizard interface pops up. Then, add the user data stored in the local disk.
7) Face group
To use a face device and enter a face group, proceed as follows: Click “ ![]() “, and select the users who have registered faces for grouping. For the users who have not registered any face, do not perform this operation.
“, and select the users who have registered faces for grouping. For the users who have not registered any face, do not perform this operation.
2. Right shortcuts key operation
Right click a region of the Employee List to Export Data (export employee’s basic information), production report is available; entire rank data also can be hideaway or showed in the current interface. Shown as following figure:
Export Data: Export all employees’ information of the current department. Operation step like as Time Attendance port.
Create report for current grid: All employees’ information in current department will display by report form. The operating method likes to export the data in Time Attendance report.
Save Grid layout: After change setting of data rank, save the data rank setting, it is allowed to use after through directly write down the data rank setting.
Show all columns: After click this option, employee’s all information appears.
Hide all columns: After using this option, employee’s all information will be hided. Columns: Show the name of composition rank of employee information in the employee view. Move the cursor to the columns of the data, as shown in the diagram below the dropdown menu popup:
As shown in the figure, the dropdown menu to display is the employee of all field information, the user can click the appropriate field tick show, do not hit the hook is not displayed.
3. Click Department setting button “ ![]() “, it is allowed to set the department setting. Its method is the same with the operation in department management.
“, it is allowed to set the department setting. Its method is the same with the operation in department management.
4. Click the pagination label of Addition. The windows will appear asfollow:

Addition page can enter the employee is more important related information, select department, selected employee, in the field column input information content input column type, content, and then save the input information can be.
5. AC Options (Attendance rule option)
Click the pagination label of AC Options. The windows will appear as follow figure:
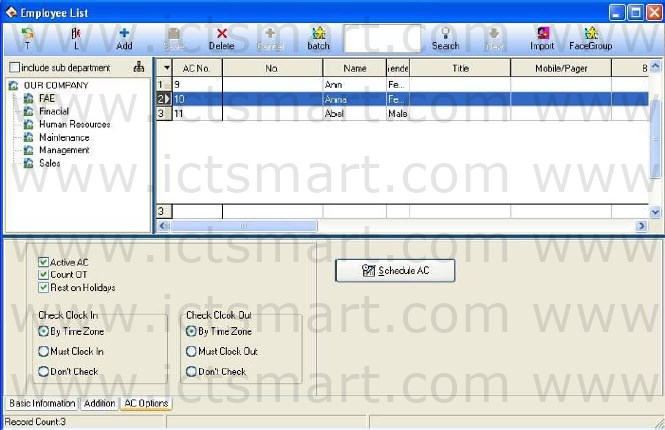
Active AC: The item means weather the attendance is valid, if this item is defined, the employee will be accounted and statistic attendance in accordance with the attendance rule and other select item, otherwise, this employee doesn’t need to keep the attendance record, and regard his record as normal onduty, E.g. A leader of the department doesn’t go to attendance, but his attendance is accounted on normal duty.
Count OT: Sign this item, counted by the employee over time.
Reset on Holidays: Sign this item, the employee will have a rest on holiday, if the employee is on duty, it will be signed to over time. Otherwise, the employees have to be on duty, if the employee is off duty, he will be accounted to absent.
Check Clock In/ Check Clock Out: This item can control the employee must checkin or checkout, the setup privilege in the item is super than it in the shift schedule.
Employee Time Attendance setting
Click “ ![]() “ button; enter employee’s Time Attendance setting widows, shown as following widows
“ button; enter employee’s Time Attendance setting widows, shown as following widows
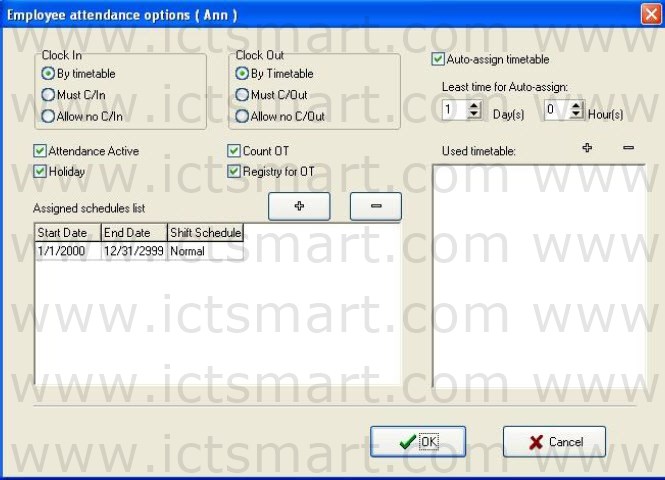
The operation is same as 2.2.6 Employee Schedule. Here not restatement.
| ย้อนกลับ | กลับสู่เมนูหลัก | ถัดไป |