All posts by Chuchai Rattaviset

Time Attendance Export Format

If use of the controller as attendance, you can depending on your needs, export attendance data form. 701Client attendance does not have a three-shift,by exporting a text file,with three-shift  attendance software.

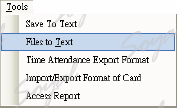
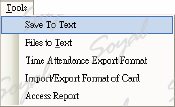
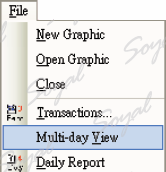
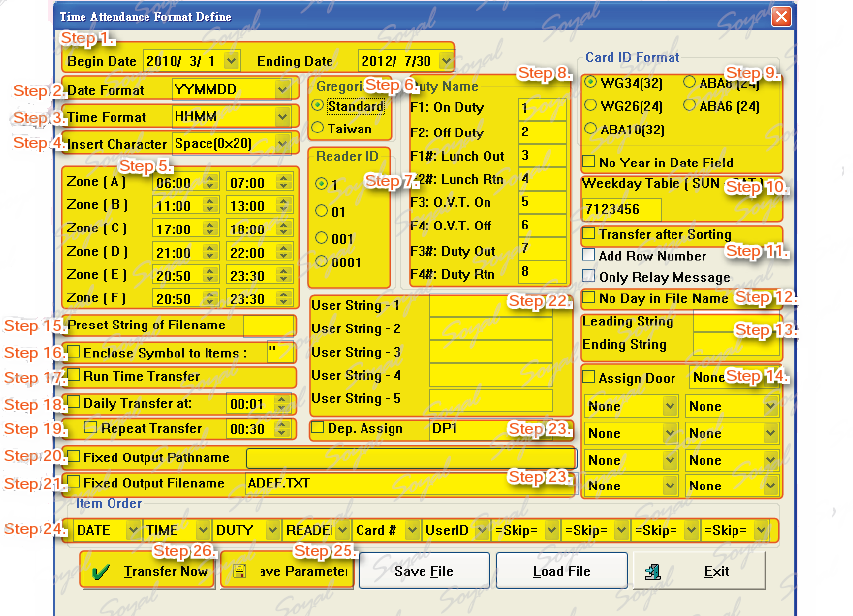
The way to show the ”Time Attendance Format Define” window:28-5-2557 10-45-56

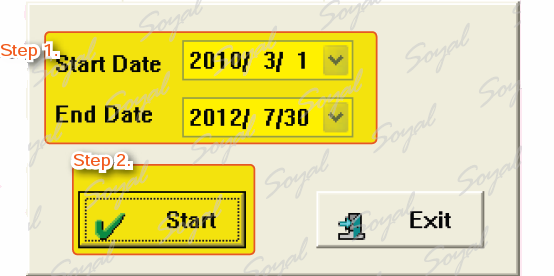
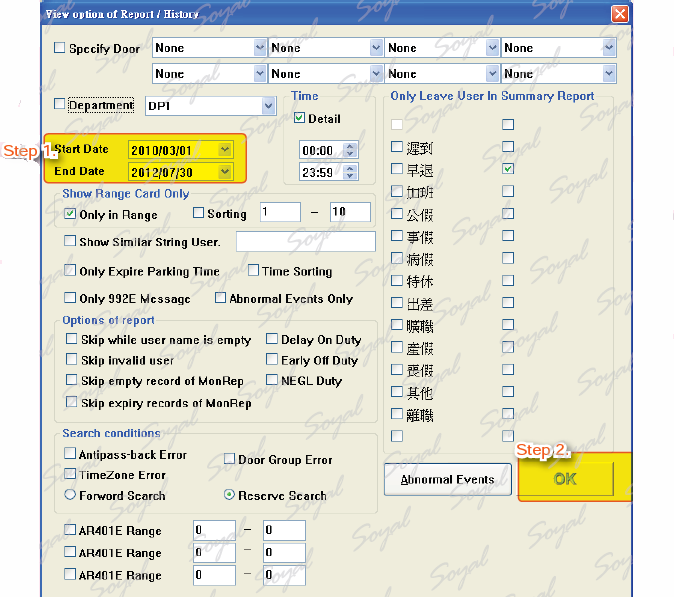
Step 1. Select Begin Date & Ending Date
Step 2. Select Date Format.
Step 3. Select Time Format.
Step 4. Select Insert Character.
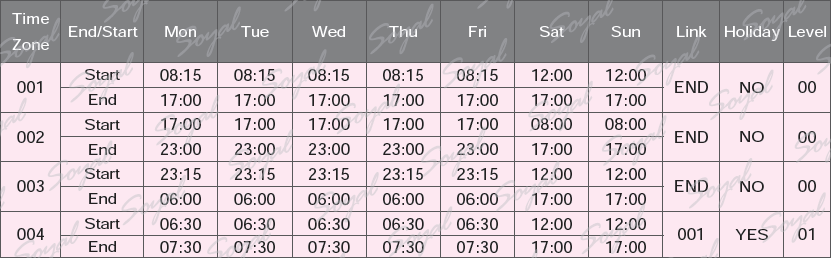
Step 5. Select time zone,6 zone for the calculation of three-shift , or meals. If you have a  choice Sorting “zone“, the system in the export log file, it will take each zone and for the first card code.
Step 6. Select Calendar type (Taiwan or Standard)
Step 7. Select Reader ID.
Step 8. Select Duty Name.
Step 9. Select Card ID Format.
Step 10. Select week table (Enter the characters).
Step 11. Transfer after Sorting: Automatic selection of the first & last of each user’s access information and sort by user ID.
Step 12. No Day in File Name.
Step 13. Intput Leading String and Ending String.
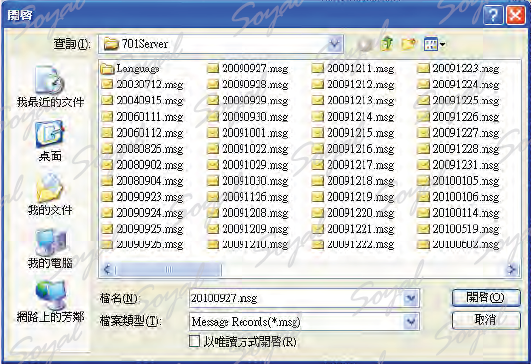
Step 14. Select which controller’s message .
Step 15. Press String of Filename.
Step 16. Enclose Symbol to ltems.
Step 17. Run Time Transfer (When there is new data, immediate storage. ※ 701Client to be kept normally open)。
Step 18. Daily Transfer at: Fixed time (※ 701Client to be kept normally open)
Step 19. Repeat Transfer:Interval time (※ 701Client to be kept normally open)
Step 17./18./19. only choose one, can not exist.
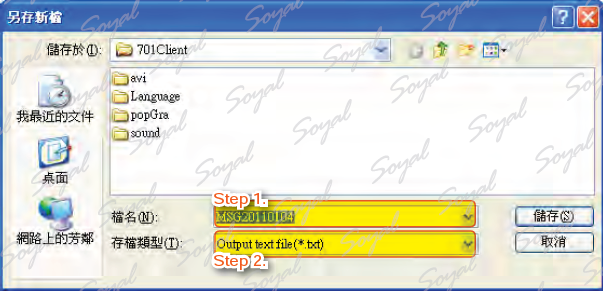
Step 20. Fixed Output Path name
Step 21. Fixed Output File name (If theOutput File name is not set, then the file will be transferred out of: Year+Month+Date. TXT as the file name )
Step 22. User String (5 string can be set)
Step 23. Select departments.
Step 24. Item Order
Step 25. Press” Save
Step 26. Press “Transfer Now

28-5-2557 10-27-25


ย้อนกลับ กลับสู่เมนูหลัก ถัดไป

Export User data

After add new card, we can export the data to the new text file (. TXT /. CSV), easy to manage users, the future can also be re-imported.

The way to show the ”Text Format Define for Card Data Transfer” window:

Step 1. 18 field(A-Q),Depending on your preferences, setting fields and field names
Step 2. AUTO Import and Download: Set the time, regularly updated information on the software.
Step 3. Download to Controller while Import Data: Import text data to the computer, the software also downloaded to the controller
Step 4. Item Space: Export data symbols of each field interval (To be a CSV file, select “,”)
Step 5. Export file path.
Step 6. Select Export Card Range.
Step 7. Press “OK”. There are two ways to open the ”User Card Edit” window
Step 8. Click ,select “Export Text File”.
Step 9. Select the path and file name(The default is .TXT, if want to EXCEL file,to select .CSV)

Note If the export is. CSV file, then import the software again, set the file extension to. TXT

ย้อนกลับ กลับสู่เมนูหลัก ถัดไป

Testing the Setting Result

Based on the above set observations out Tom’s access records and information.

Step 1. Present the card (card site code and card code: 00750 37883) to the AR-721H (Front Door),AR-727H (Back Door) and AR-829E (Warehouse).

27-5-2557 16-05-45

Step 2. Click 27-5-2557 16-04-35to open Open Files window and select today’s date, press Open button.
Step 3. “TRANSACTION RECORDSxxxxxxxx.msg” tag will be openedand the access records will be observed in 701Client.

27-5-2557 16-06-1027-5-2557 16-06-37


Index: each access record or message has a number.
Time: access time (hour, minute and second).
Station: access controller node ID, for example: “002-01: Front Door”, 002: AR-716E node ID, 01: AR-721H (Front Door) node ID, Front Door: AR-721H Door Name)
Num: user address, Tom’s user address is 00001.
Name: user name.
Department: the first department, Tom’s first department is DP1.
Department:2: the second department, Tom’s second department is DP2.
UserID: Employ ID, Tom’s employ ID is 8217.
Status: access status.
Detail: access remark.

ย้อนกลับ กลับสู่เมนูหลัก ถัดไป

SalaryEdit

The attendance report can be used to calculate salary.

The way to open the ”Salary Table” window:27-5-2557 15-52-56

Step 1. User: from the list select want to set the user address and user name.
Step 2. Salary Payment (Hour): the overtime pay (base on hour).
Step 3. Leave Deduction (Hour): leave of absence salary deductions (base on hour).
Step 4. 1st Overtime Sec. (Min): the first overtime period base (base on minute).
Step 5. 1st Overtime Multiple: the first overtime period pay (Rate x payroll in hour base).
Step 6. 2nd Overtime Multiple: the second overtime period pay (Rate x payroll in hour base).
Step 7. Sat/Sun OVT Multiple: saturday or Sunday overtime pay (Rate x payroll in hour base).
Step 8. Holiday OVT Multiple: holiday overtime payl (Rate x payroll in hour base).
Step 9. Delay Deduction (Min): delay and to leave early salary deductions (base on minute).
Step 10. Free Delay Time (Min): to be acceptable late the number of minutes.
Step 11. Free Delay Times: be accepted late times.
Step 12. Nonleave Bonus: attendance bonus (base on month), please input be acceptable the number of minutes and times.
Step 13. Lunch Allowance: lunch at this time will have lunch bonus ( the time between 11:00am and 02:00pm).
Step 14. Dinner Allowance: input the time will be used in overtime meal allowance expenses.
Step 15. Health Insured Val.
Step 16. Insured Family
Step 17. Labor Insured Val.
Step 18. Health Ins. Deduct.
Step 19. Labor Ins. Deduct.
Step 20. Payment/Discription : user base salary, welfare etc.
Step 21. Birthday: user’s date of Birth.
Step 22. Take office: take office date.
Step 23. Leave office: leave office date.
Step 24. Press Yes button to save all settings.

27-5-2557 15-41-15

Note
Using “Copy to Buffer” button and “Paste from Buffer” button to set salary table to Improve efficiency (before use Using “Copy to Buffer” button and “Paste from Buffer” button remember to select “User” field content).
※ Can open User Card Edit window and Salary Table window improve operation  efficiency.

ย้อนกลับ กลับสู่เมนูหลัก ถัดไป

Download To Controller

In the 701 handle all of the settings should be downloaded to the controller to simultaneously control.

There are two ways to open the ”Download To Controller” window:27-5-2557 15-29-36and27-5-2557 15-30-06

Step 1. Check which access controller node ID data will be downloaded.
Step 2. Clock: press “Clock ” button to download clock data and to synchronize the PC and controller, both sides of the time synchronization ,control and management of the data will correctly (refer to 27-5-2557 15-30-29).
Step 3. Time Zone: press “Time Zone” button to download time zone data (refer to27-5-2557 15-30-58 ).
Step 4. Door Group: press “Door Group” button to download door group data (refer to27-5-2557 15-31-17 ).
Step 5. User Card: press “User Card” button to download user data (refer to 27-5-2557 15-31-33).
Step 6. Holiday: press “Holiday” button to download holiday data (refer to 27-5-2557 15-31-49).
Step 7. Alias/Start Date: press “Alias/Start Date” button to download alias and start date data
(refer to 27-5-2557 15-31-33).
Step 8. All Items: press “All Items” button to download all setting data.
Step 9. Press Exit to quit.

27-5-2557 15-26-49

Note
If you select “Verify User Data” when download data completed will download data again. ※ Before download data, please confirm connunication or access controller node ID is correctly.
※ Must download “Clock”, PC and access controller of the time synchronization, control and management of the data will correctly.

ย้อนกลับ กลับสู่เมนูหลัก ถัดไป

User Card Edit

Setting user data, user access level, user door groups, access mode etc.

There are two ways to open the ”User Card Edit” window:27-5-2557 14-57-55and27-5-2557 14-58-10

Step 1. User Num: User Num= user address which depend on the controller user capacity, 1-1,024 or 1- 14,999.
Step 2. Lock: When you edit the user data, please tick “Lock” to avoid switching and unstable.
Step 3. Auto Save Card ID: when enroll new card, please tick here then present the card to the controller reader to auto save card ID.
Step 4. Card ID: card ID is the manufactured ID.
Step 5. Access Mode: invalid, Card only, Card or Pin, Card and Pin for select (refer to 27-5-2557 14-58-33).
Step 6. Zone: 1 to 63 zones, All= Not limited (refer to27-5-2557 14-58-51 ).
Step 7. Level: user level setting, 00 to 63 degree.
Step 8. Door Group: 1 to 253 groups. All= Not limited, No= Not authorized for any door group,Set= Only support to AR-716E and AR-829E (refer to 27-5-2557 14-59-06). ※ Zone, Level and Door group comparison only support to AR-716E, AR-829E and AR-821EF, not for 7-seriers please kindly mention.
Step 9. Name/Alias: user name will be showed in access records.
Step 10. P.I.N. Code: when access mode is “card or PIN” or “card and PIN” in M4/M8 must set the private access mode password (private PIN), if the M6, you need to set a public access mode password (public PIN).
Step 11. Changealbe: user could change the access PIN in reader side directly. If access controller connect under the Multi-Door Networking Controller(AR-716E) the changed PIN (if access controller connect under the Multi-Door Networking Controller (AR-716E) the modified password be saved in AR-716E).
Step 12. Employe ID
Step 13. Photo: upload user photo to correctly recognized.
Step 14. Date Limits: support to the configuration which within AR-716E, AR-829E or AR-821EF.
Step 15. Depart.: here the department could be edited directly into those two blank.
Step 16. Duty#: there are 50 sets duty for editing (refer to 27-5-2557 15-00-04).
Step 17. User Data: card ID, Birthday, VisaiD, Gender, E-mail, TEL, Addr..
Step 18. Anti-Pass Back: enable user’s anti-pass back function.
Step 19. Guard: only keep the message while flashing the card not release the door.
Step 20. Skip FP Check: when use AR-821EF, if want to disable user’s FP check, please tick here.
Step 21. Cleaner: this is reserved function for hotel system.
Step 22. Press Save button to save all settings.

27-5-2557 14-48-00

Door Group

27-5-2557 15-00-49

Time Zone

27-5-2557 15-01-13

User name: Tom. User address: 00001. Passable time zone and door gruop: Monday to Friday 08:15-17:00 and Sat to Sun 12:00-17:00. His acces mode is card and PIN, but he as long as present the card to the controller reader can pass, because his level is 01 higher than time zone level 00 and door group level 00. In this way can make the access more flexible and applications.

Grade Comparison Chart

27-5-2557 15-01-39

Quickly to set time zone and location please refer to the following set (when access controller connect under the Multi-Door Networking Controller(AR-716E)).

27-5-2557 15-02-07

Note
When “Door Group” is Set the “Zone” will become invalid. ※This function only be used when access controller connect under the Multi-Door Networking Controller(AR-716E).

Step 1. Selection locaton will be modifed.
Step 2. Press “Modify Zone” to modify time zone(refer to 27-5-2557 15-04-03).
Step 3. Press EXIT button to save all settings.

27-5-2557 15-04-25


ย้อนกลับ กลับสู่เมนูหลัก ถัดไป