If you need to generate attendance reports you need to set schedules. There are 00-63 schedule for editing
There are two ways to open the ”Attendance Edit” window:and
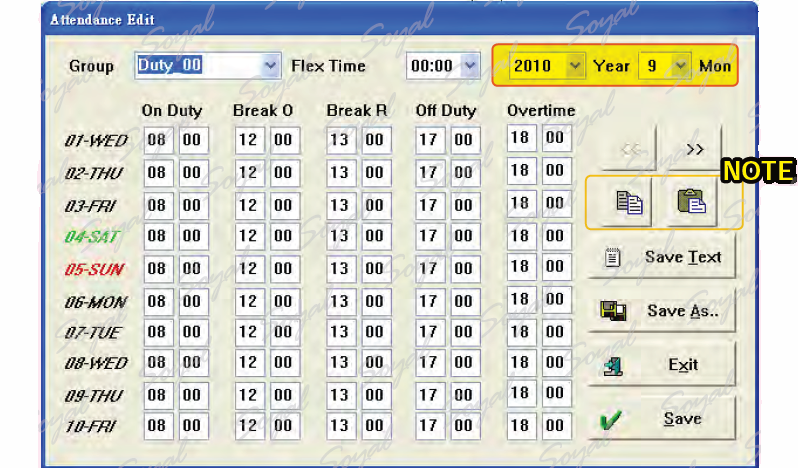
Step 1. Selection attendance group that must be set for the attendance report. Step 2. Selection flex time. Step 3. Input time for the attendance report Step 4. Press Save button to save all settings or Save set to *.txt file. Step 5. Press EXIT button to quit.
Note
Break O and Break R: Computer will automatically deduct the two periods. ※ If overtime is 00:00 the overtime starting time of with the working hours same, overtime hours should be set later to avoid affecting calculation of salaries.
If you want to set schedules base on month please refer to the following description.
The way to open the ”System Parameters Setting” window:
There are two ways to open the ”Attendance Edit” window:and
Note
Using “Copy to Buffer” button and “Paste from Buffer” button to set schedules to Improve efficiency.
Selection is holiday a date to help control Holidays access permissions. Can set for the Holidays the number of days is 120.
There are two ways to open the ”Holiday Edit” window:and
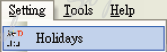
Step 1. Selection year that must be set for the holiday. Step 2. Selection month that must be set for the holiday. Step 3. Selection day that must be set for the holiday. Step 4. Press Save button to save all settings. Step 5. Press EXIT button to quit.
Note Save Office Day: Saving set to *.wth file. Read Office Day: Reading *.wth file. Save As : Saving set to *.hol file.
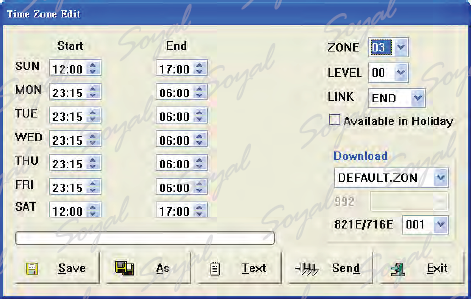
Access controller have real time clock can set time zone to control access time. There are
0-63 access level for editing.
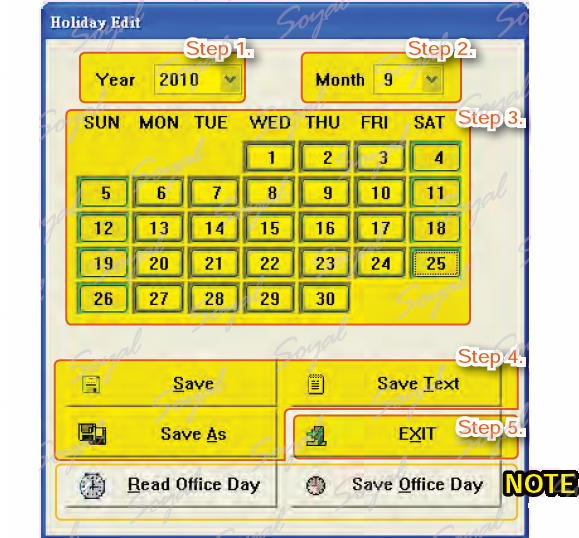
For example:
There are two ways to open the “Time Zone Edit” window:and
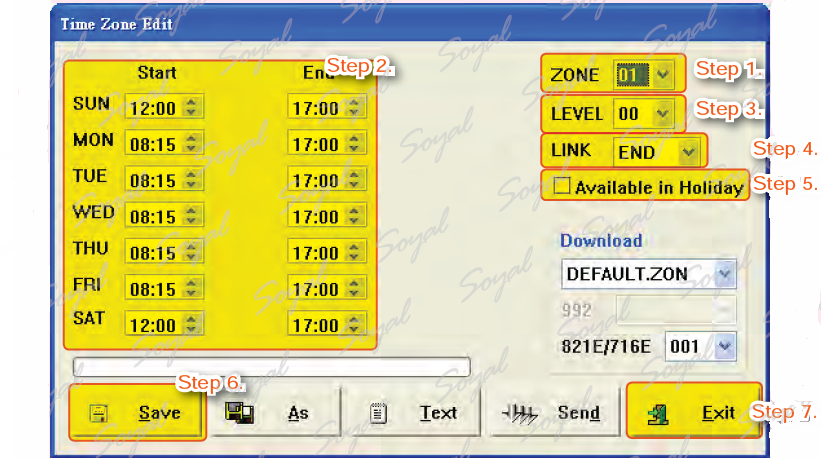
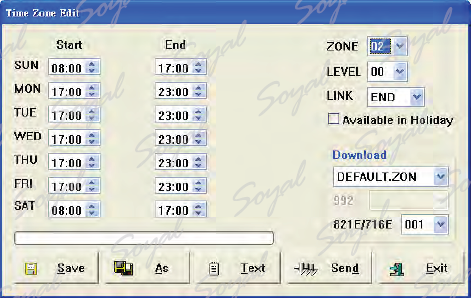
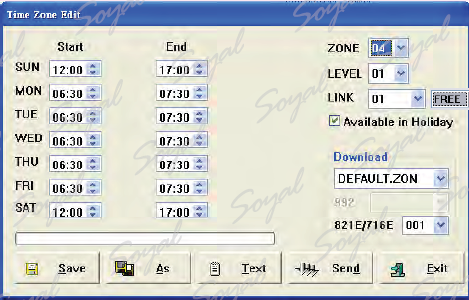
Step 1. ZONE: 00-63 time zone for editing. For example: 001. Step 2. Monday to Friday, the starting of the time zone and ending of the time zone. Step 3. LEVEL: 00-63 level for editing. Level include time zone level, door groups level and user level. Various levels between the comparison will determine the user’s permission. 63 is the highest authority. Step 4. LINK: each door group can be with another door group linked. Door group and the door group between the is not the link , link fields must select END. Emergency occurs the link fields can select FREE. Step 5. Available in Holiday: holidays can also pass the time. Step 6. Press Save button to save all settings. Step 7. Press Exit button to quit.
Note Emergency occurs the link fields can select FREE.
Zone 00: This time period can be used to set the switch time of attendance duty. Zone 63: zone63 for auto open time. Zone 62: zone62 for auto arming. Zone 61: Reset is used when the user violations and emergencies, reset function of anti-pass back, this function be set in zone 61 .
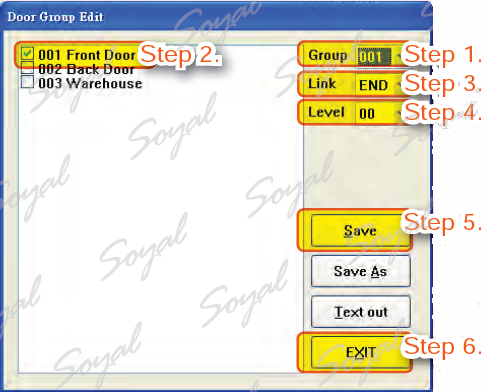
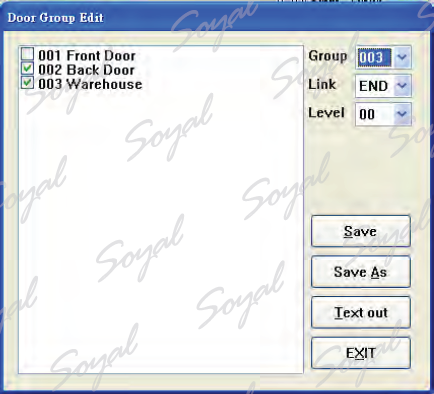
How to control the door access authority? You can set door groups to manage and control user access. For example, Door groups for Accounting dep. only for accounting department, door groups for RD dep. only for RD department. A total of 225 groups doorgroup can be set.
For example:
There are two ways to open the ”Door Group Edit” window: and
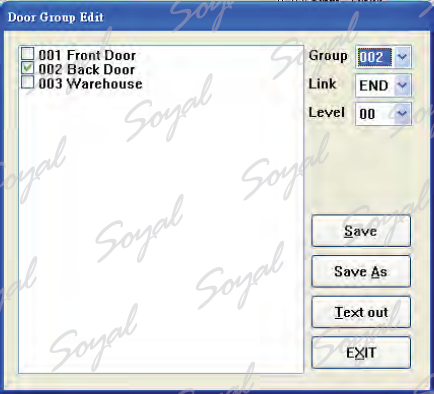
Step 1. Group: 1-255 set of door groups for selection. For example: 001. Step 2. Selection door number and door name to be door group. Selection 001 that is mean group 001 can access front door. Step 3. Link: each door group can be with another door group linked. Door group and the door group between the is not the link , link fields must select END. Step 4. Level: 00-63 level for editing. Level include time zone level, door groups level and user level. Various levels between the comparison will determine the user’s permission. 63 is the highest authority. Step 5. Press Save button to save all settings. Step 6. Press EXIT button to quit.
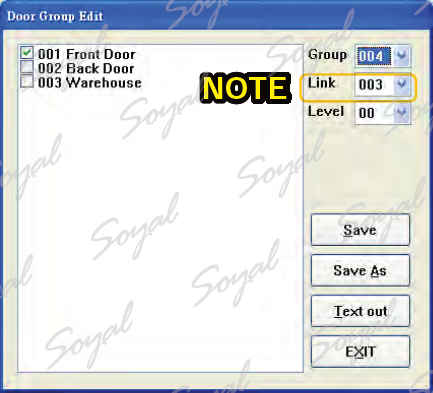
Note
Each door group can bewith another door grouplinked and to increase access door groups. For example : group 004’s door groups for access is Front Door,Backe Door and Warehouse.
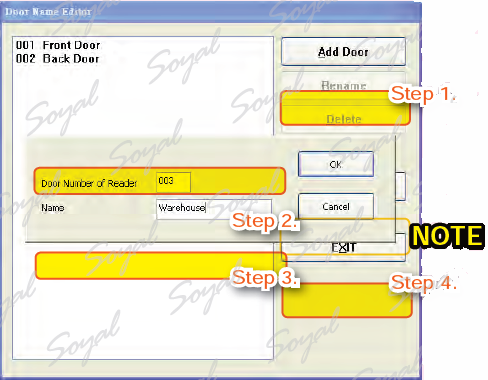
Setting the access controller corresponding to the door, place or area.
There are two ways to open the 701E Parameter window: and
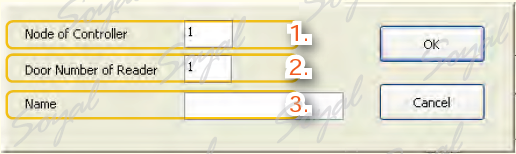
Step 1.Press “Add Door” button. Step 2. Door Number of Reader: input access controller door number. Step 3. Name: input the access controller corresponding to the door name (door number 001: front door, door number 002: back door, door number 003: warehouse. Step 4. Press EXIT to quit (press “Rename” to modify data).
Note
Save As: Save settings for future use. In “Door Name Editor” window, small architecture just input the door number and door name to add door data. In “System Parameters Setting” window and select “Enalbe Huge-Door-Group Mode” will become huge architecture, in “Door Name Editor” window” you must input 1. Node of Controller 2.Door Number of Reader 3. Name as shown below.
1.Node of Controller:
1. H series access controller (AR-721H) connect under the Multi-Door Networking Controller(AR-716E): AR-716E’s node ID.
2. E series access controller (AR-829E): access controller node ID.
3. H series access controller (AR-721H) connect with PC directly: access controller door number H. 2.Door Number of Reader:
1. H series access controller (AR-721H) connect under the Multi-Door Networking Controller(AR-716E): access controller door number L.
2. E series access controller (AR-829E): access controller door number.
3. H series access controller (AR-721H) connect with PC directly: access controller door number L. 3.Name: the name of door number.
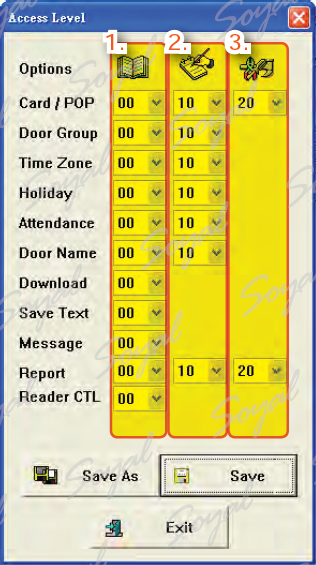
Operator access level compared with permission to operate the software in order to determine the user’s permission to operate the software.
1. Query: if users level of the lower do not have permission to query the following items. 2. Modify: if users level of the lower do not have permission to modify the following items. 3. Advanced: if users level of the lower do not have permission to use the following advanced features (include edit user data and modify daily report).
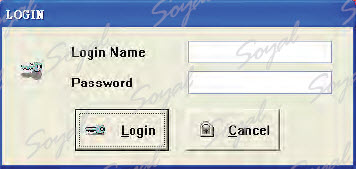
Login The first time to login 701Server, Login Name and password both are supervisor. Login Name: supervisor Password: supervisor
To improve security, change your password and access level immediately after login.
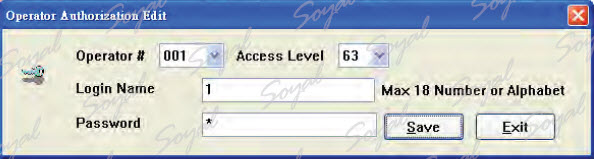
Access Level/Password Help→Authorization and then Operator Authorization Edit window will come out. Items can be modified as follows: 1. Operator #: 0-119 operators for editing their access level, login name and password. 2. Access Level: 0-63 access level for editing. 63 is the highest authority. 3. Login Name: login name can have up to a total of 18 English words or 9 Chinese characters. 4. Password: password can have up to a total of 18 English words or 9 Chinese characters.
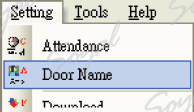
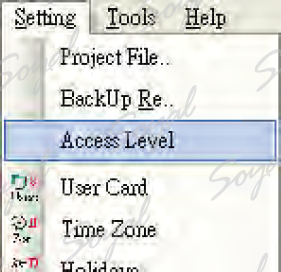
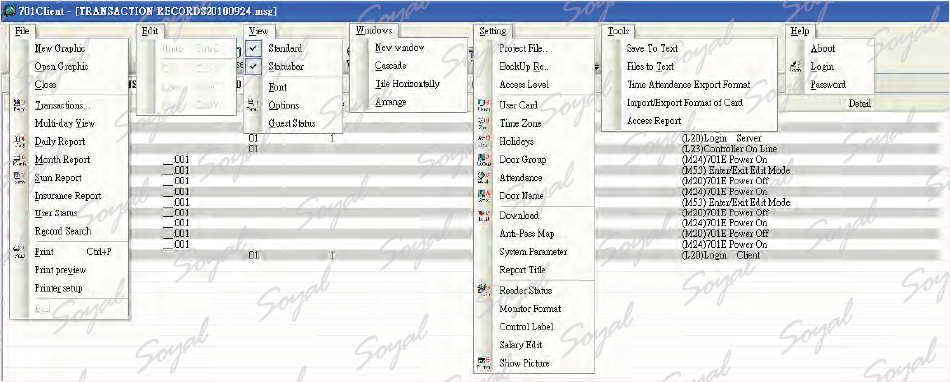
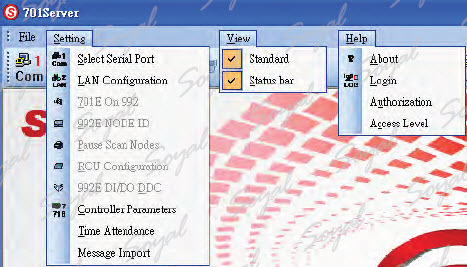
Setting
Select Serial Port : Select a port can link computers and controllers. LAN Configuraton : Setting access controller node ID, item No to help achieve the correct connection and data transmission. Controller Parameters : Setting AR-716E node ID and parameters. Time Attendance : Time attendance related processing. Message Import : Import message and file.
View
Standard : View tool bar Status Bar : View status Bar
Help
About : You can find the version of 701Server. Login : Login again Authorization : 0-119 operators for editing their access level, login name and password. Access Level : Permission to operate the software.
No part of this website or any of its contents may be reproduced, copied, modified or adapted, without the prior written consent of the author, unless otherwise indicated for stand-alone materials. You may share this website by any of the following means: 1. Using any of the share icons at the bottom of each page (Google Mail, Blogger, Twitter, Facebook, Google+); 2. Providing a back-link or the URL of the content you wish to disseminate; and 3. You may quote extracts from the website with attribution to www.ictsmart.com
 and
and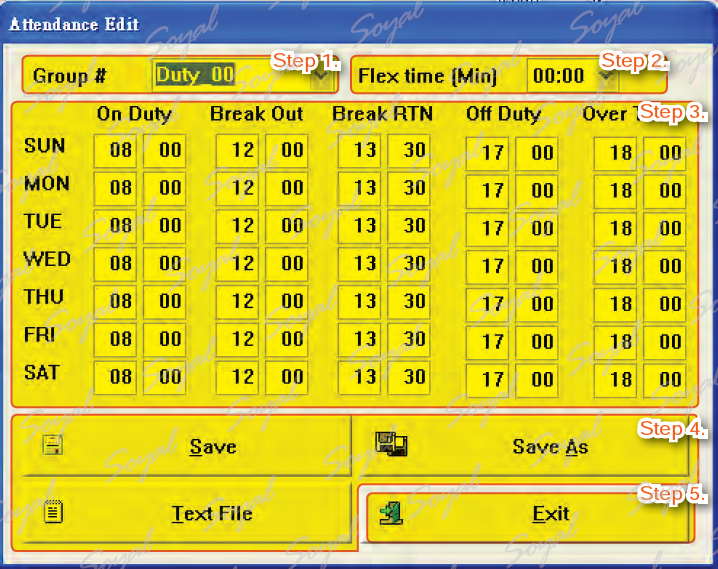

 and
and